
Summer Science Activities Your Child Will Love

Try these fun, hands-on experiments this summer!
During the school year, afternoons are often filled with studying, completing homework assignments, and rushing from one activity to the next. There is soccer to get to, piano to practice, and papers to be organized. Yet over the summer, this frenetic pace tends to slow down and there is more wiggle room for exploration and experimental learning. Summer is a great time for performing hands-on, fun, eye-opening science experiments. Try these experiments at home, and watch your child develop a real zest for science while building important academic skills. He will be ready and excited to continue his scientific exploration once the school year begins.
Chemistry
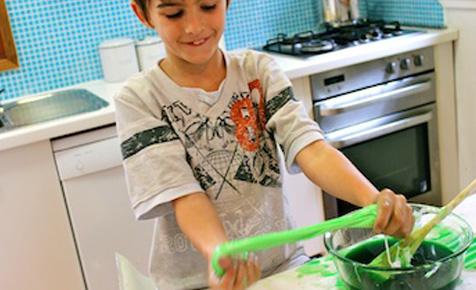
Make slime! Almost all kids love playing with slime, especially when it’s green and gooey. Try making your own by combining a quarter cup of glue and a quarter cup of water, adding a few drops of food coloring, and then mixing in a quarter cup of liquid starch. Knead the blobby concoction with your hands, and you will notice it becomes starchier the more you play with it. Then explain to your child that the glue is a liquid ploymer, meaning its molecules are linked together like a chain. When you add the glue to the mixture, its strands hold the mixture together and makes it feel slimy.
Grow crystals. There are so many different types of crystals to build and explore, but try building these “quickie” crystals that should take only about three hours or so to grow. Simply mix together a half cup of Epsom salt, a half cup of hot water, and a drop of food coloring in a small bowl. Then put the bowl in the refrigerator and leave it there for three hours. Remove it from the fridge and examine the bowl of crystals with your child. Explain to her that by cooling the solution quickly in the refrigerator, the magnesium sulfate atoms in the Epson salt join together to form crystals.
Physics
Make a milk rainbow, otherwise known as tie-dye milk, milky fireworks, or magic milk. This experiment is incredibly cool to watch! All you need is whole milk, food coloring, liquid dish soap, q-tips, and a shallow dish. Pour a half cup of milk into the shallow dish, squeeze in drops of different colored food coloring, dip a q-tip into the dish soap and then into the milk (on a food coloring spot), and watch as the colors explode! As you continue this process over and over again, explain to your child that the detergent is interacting with the fat molecules in the milk.
Learn how straws work. This is a simple but educational one. All you need is a cup of soda and a straw. Have your child put the straw in the cup and suck from it, then cover the bottom end with his finger and remove it from the cup. Finally, have him take his finger off the bottom when he brings the straw to the counter. Note that when his finger was covering the bottom of the straw the soda stayed inside but when he released his finger, the soda came out. Why does this happen? Explain to him that when his finger was covering the bottom, there was less air pressure from above the straw and more under the straw. That higher pressure held the soda inside.
Earth and Life Science
Study rocks. Have your child collect rocks from your backyard and lay them out on a table. Encourage her to explore them and think of questions about the rocks. You might want to try the “scratch experiment” with your child to compare hard rocks (like granite) to soft rocks (like limestone). To do so, use a nail to scratch the surface of each rock. You’ll notice that on some rocks, the nail will leave a silver line, meaning the rock is harder than the nail. For other rocks, you will simply see a scratch line or dust, meaning the nail is harder than the rock (and, as such, the rock is softer).
Create a giant worm tower! To do this activity, you will need to collect worms from your backyard or a garden. You will also need a 2 liter plastic soda bottle, dirt, gravel, and dark colored paper. To start, cut off the top of the soda bottle and fill it with gravel on the bottom and soil on top. Once it’s about half full, add the worms. Put the top of the bottle on, turn it upside down, and add some water to the soil. Then, cover the bottle with the paper to make a dark environment for the worms. After a few days, remove the paper and see what the worms are up to!